

TL;DR:
- Proper surface preparation is essential for a successful paint protection film installation because contaminated or defective paint bonds permanently under the film. Skipping cleaning, decontamination, or paint correction leads to visible defects, bubbles, or edge lifting that cannot be repaired later. Professionals follow a multi-stage process in a controlled environment to ensure surface readiness and optimal adhesion.
Proper surface preparation is the single most critical factor in a successful paint protection film (PPF) installation. PPF, also called clear bra film in the industry, bonds directly to your vehicle’s paint, which means any contamination or defect underneath becomes permanent once the film goes down. The core steps to prepare your vehicle for PPF include a pH-neutral hand wash, chemical decontamination with iron and tar removers, mechanical decontamination with a clay bar, paint correction, and a final isopropyl alcohol (IPA) wipe. Skipping or rushing any of these steps produces bubbles, edge lifting, or visible imperfections that no amount of post-install care can fix.
1. What are the initial cleaning steps before applying PPF?
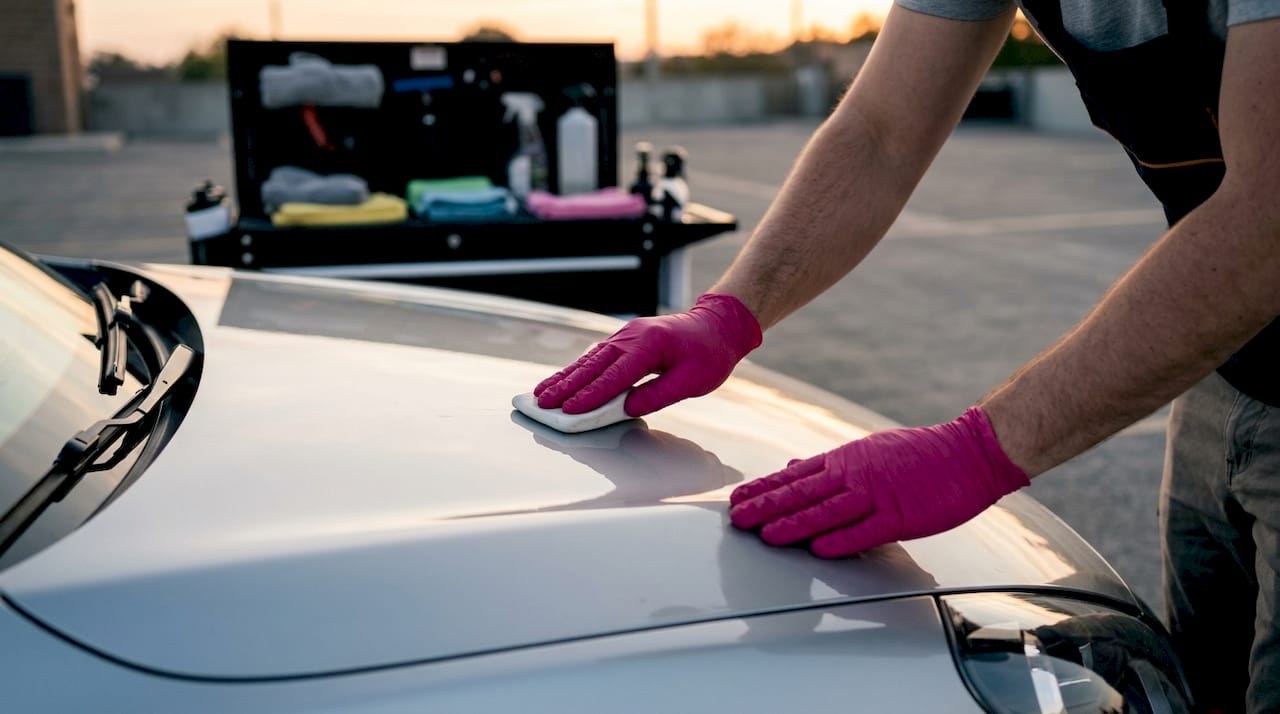
A thorough hand wash is the foundation of every PPF installation prep. The goal is to remove loose dirt, road grime, and surface debris before any decontamination or correction work begins. Washing after decontamination defeats the purpose, so sequence matters.
Use a pH-neutral car shampoo and the two-bucket method: one bucket for clean soapy water, one for rinsing your microfiber mitt. This prevents dragging abrasive particles back across the paint. The standard decontamination protocol starts with this hand wash stage before any chemical or mechanical steps follow.
- Use a high-quality microfiber wash mitt, never a sponge or brush
- Wash wheels and tires first to prevent brake dust from contaminating the paint panels
- Rinse the vehicle thoroughly from top to bottom
- Dry with a clean microfiber drying towel using a patting motion, not circular wiping
- Avoid automatic or brush car washes entirely, as they introduce fine scratches
Pro Tip: Run your hand across the paint after washing. If it still feels rough or gritty, the surface needs decontamination before you move forward.
Cleaning the full vehicle matters even if PPF will only cover certain panels. Contamination from unwashed areas migrates during the installation process and can land on freshly prepped surfaces.
2. How does chemical and mechanical decontamination prepare the paint surface?
Washing removes surface dirt, but bonded contaminants stay embedded in the clear coat. Chemical and mechanical decontamination targets these particles directly. This stage is where paint decontamination separates a professional prep from a basic wash-and-go job.
Chemical decontamination uses two primary products:
- Iron remover: Dissolves metallic brake dust particles that have bonded to the clear coat. These particles oxidize and expand, causing micro-damage if left in place.
- Tar and adhesive remover: Breaks down road tar, tree sap residue, and adhesive spots that iron remover does not address.
After chemical decontamination, mechanical decontamination follows using a synthetic clay bar. The clay bar stage physically pulls out embedded contaminants that chemicals loosen but do not fully remove. The result is a surface that feels like glass rather than fine sandpaper.
The final step in this stage is an IPA wipe using isopropyl alcohol at a 20–30% concentration. This removes any remaining oils, wax residue, or product buildup that would prevent the PPF adhesive from bonding cleanly to the paint.
Pro Tip: Run a clean plastic bag over the paint after claying. The bag amplifies texture feedback, making it easy to feel any remaining rough spots that need another pass.
Surface preparation at this level is not optional for high-value vehicles. Contaminants trapped under the film create permanent texture irregularities that are visible in direct sunlight.
3. Why paint correction matters before PPF installation
PPF is transparent. Every swirl mark, scratch, and buffer trail beneath it remains fully visible after the film goes down. Paint correction before installation is the step that eliminates those defects permanently.
A single-stage machine polish removes 80–90% of swirl marks, producing a clean, uniform surface that the film enhances rather than exposes. For vehicles with deeper scratches or heavy oxidation, a multi-stage correction process is necessary before any film work begins.
- Inspect the paint under bright, angled shop lighting to identify all defects
- Determine the correction level needed: single-stage polish or multi-stage compounding and polishing
- Perform machine polishing using a dual-action or rotary polisher with the appropriate pad and compound
- Re-inspect under specialized shop lighting after each correction pass
- Perform a final IPA wipe after correction to remove all polish oils before film application
Paint correction is optional only when the paint is already in near-perfect condition. For most daily-driven vehicles, some level of correction is necessary. Skipping it on a car with visible swirls means those swirls are locked in permanently under the film.
Fresh paint or recent bodywork requires special attention. Paint done within 30 days must fully cure before PPF application. Applying film over uncured paint traps solvents and can cause adhesion failure or paint damage when the film is eventually removed.
4. What practices must be avoided before PPF application?
Several common owner habits directly undermine PPF adhesion. Knowing what not to do is as important as knowing the correct prep steps.
- Do not wax, seal, or apply ceramic spray within 48 hours of your appointment. Wax and sealants create a barrier that prevents the PPF adhesive from bonding to the paint, leading to edge lifting within weeks.
- Do not use an automatic or brush car wash in the days before drop-off. These introduce fresh scratches and leave chemical residues.
- Avoid long highway drives immediately before the appointment. Road debris and bug splatter add contamination that the installer must then remove.
- Keep the vehicle in a garage or covered space if possible. Outdoor parking exposes freshly washed paint to tree sap, bird droppings, and pollen.
Pro Tip: Many owners mistakenly apply a quick detailer or spray wax the day before their appointment thinking it helps. It does the opposite. Arrive with a clean, product-free surface.
Wax or sealants applied before PPF are one of the most common causes of premature film failure. The adhesive needs direct contact with bare, clean paint to bond correctly.
5. How professional installers prepare and verify vehicle readiness
Professional installers follow a multi-stage prep process that mirrors the steps above, but with commercial-grade products and controlled environments. Understanding what a quality shop does helps you evaluate whether your installer is doing the job correctly.
“Installers should be judged by their prep process, not their speed. Thoroughness at every stage determines how long the film performs and how good it looks on day one.”
| Prep Stage | What It Accomplishes |
|---|---|
| pH-neutral hand wash | Removes loose contamination before chemical work begins |
| Iron and tar removal | Dissolves bonded metallic and organic particles from the clear coat |
| Clay bar treatment | Mechanically extracts remaining embedded contaminants |
| Paint correction | Eliminates swirls, scratches, and defects the film would otherwise magnify |
| IPA wipe at 20–30% | Strips all oils and residues for clean adhesive contact |
A climate-controlled, dust-free environment is non-negotiable for quality PPF work. A single dust particle trapped under the film creates a permanent bubble that cannot be removed without lifting and reapplying the film.
Thorough prep takes 1–2 days for a full vehicle. A shop promising same-day full-car PPF is almost certainly skipping critical stages. That shortcut shows up as bubbles, lifting edges, and visible defects within months.
Owners play a role in this process too. Clear personal items from the vehicle before drop-off and communicate any recent paint repairs, resprays, or touch-ups. This information lets the installer adjust the prep schedule and avoid damaging fresh paint during the process.
Key takeaways
Proper vehicle preparation for PPF requires a clean, decontaminated, and defect-free surface, because the film bonds permanently to whatever condition the paint is in at the time of installation.
| Point | Details |
|---|---|
| Wash before everything | Use a pH-neutral shampoo and two-bucket method before any decontamination step. |
| Decontaminate in sequence | Apply iron remover, then tar remover, then clay bar, then IPA wipe at 20–30%. |
| Correct paint defects first | PPF magnifies swirls and scratches; a single-stage polish removes most of them. |
| Avoid wax for 48 hours | Wax and sealants block adhesive bonding and cause edge lifting within weeks. |
| Communicate vehicle history | Report fresh paint or bodywork done within 30 days before your appointment. |
What I’ve learned about PPF prep after years in this industry
The most common mistake I see is owners treating PPF as a solution to paint problems rather than a protector of good paint. PPF does not hide defects. It locks them in. A swirl mark that was barely visible before the film goes down becomes a permanent fixture you will notice every time light hits the panel at the right angle.
The second mistake is underestimating how much the environment matters. I have seen technically correct prep work ruined because a shop opened a bay door and let in outside air during installation. Dust settles fast. A controlled environment is not a luxury for high-value vehicles. It is the baseline requirement.
My advice to any owner preparing for a PPF appointment: arrive with a clean, product-free vehicle and be honest about the paint’s history. If a panel was resprayed six months ago, say so. If you applied a ceramic spray last week, say so. That information changes how the installer approaches the prep, and it protects you from adhesion failures that get blamed on the film rather than the prep.
Judge your installer by how long they spend preparing the surface, not how quickly they get the film on the car. A shop that rushes prep to hit a same-day deadline is not working in your vehicle’s interest.
— Emmanuel
Professional PPF installation at Mannyceramicprotouch
Mannyceramicprotouch applies every preparation step covered here to each vehicle that comes through the studio. The process is not abbreviated for speed or volume.

Every vehicle receives a full multi-stage decontamination, paint correction assessment, and IPA wipe before any film touches the surface. The studio operates in a climate-controlled facility specifically to prevent the dust contamination that ruins installations done in open bays. For owners who want expert PPF installation backed by a thorough prep process, Mannyceramicprotouch handles luxury, exotic, and high-value vehicles with the detail-driven approach these cars require. Learn more about car paint protection in South Florida and what a quality installation actually involves.
FAQ
How long before a PPF appointment should I stop waxing my car?
Stop applying wax, sealants, and ceramic sprays at least 48 hours before your appointment. These products create a barrier that prevents the PPF adhesive from bonding to the paint.
Does PPF hide scratches and swirl marks?
PPF does not hide defects. Because the film is transparent, it magnifies imperfections already present in the paint. Paint correction before installation is the only way to address existing swirls and scratches.
How long does professional PPF prep take?
Thorough preparation for a full vehicle typically takes 1–2 days. Shops completing full-car PPF in a single day are almost certainly skipping critical prep stages.
Do I need to tell my installer about recent paint repairs?
Yes. Paint or bodywork done within 30 days needs a full cure period before PPF can be applied. Informing your installer allows them to adjust the schedule and avoid damaging fresh paint during film application or removal.
Can I wash my car right before dropping it off for PPF?
A basic hand wash with pH-neutral shampoo is fine. Avoid automatic or brush car washes, and do not apply any product after washing. Arrive with a clean, product-free surface and let the installer handle the decontamination stages.