TL;DR:
- Knowing how to identify and properly repair minor paint flaws at home can protect a vehicle’s appearance and value.
- Thorough preparation, correct application techniques, and verifying results under multiple light sources are essential for seamless repairs.
Minor paint flaws have a way of making even a well-maintained vehicle look neglected. Whether you are dealing with a parking lot scratch, a small chip from road debris, or surface swirls that appeared after an automatic car wash, knowing how to correct minor paint flaws at home can protect both your car’s appearance and its resale value. This guide walks you through identifying damage types, gathering the right tools, executing repairs step by step, and verifying results before adding long-term protection to keep your finish looking its best.
Table of Contents
- Key takeaways
- How to correct minor paint flaws: identifying damage first
- Tools and workspace setup
- Polishing out surface scratches step by step
- Repairing chips and deeper scratches
- Common mistakes and how to verify results
- What I have learned from years of paint work
- Protect your paint after every repair
- FAQ
Key takeaways
| Point | Details |
|---|---|
| Identify before you act | Knowing whether damage hits the clear coat, color coat, or primer determines which correction method to use. |
| Environment matters as much as skill | Working in a shaded, dust-free space above 60°F directly affects how well paint adheres and cures. |
| Thin coats beat thick ones | Applying multiple thin layers of touch-up paint prevents runs, blobs, and raised edges. |
| Patience protects your work | Polishing before the 24 to 48 hour cure window is one of the most common reasons DIY repairs fail. |
| Protection extends the repair | Ceramic coatings or paint protection film applied after correction shield the surface from future damage. |
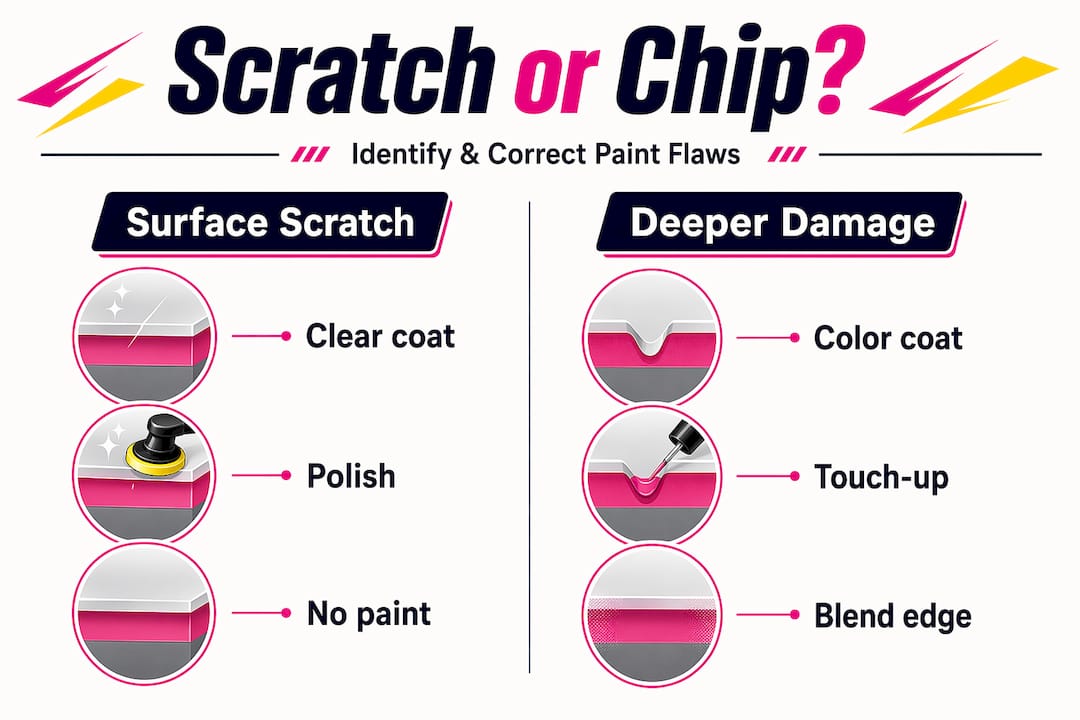
How to correct minor paint flaws: identifying damage first
Not every scratch requires the same fix. Surface scratches, small scratches, and chips each represent a different layer of damage, and treating them the same way is a fast route to a worse result.
Surface scratches affect only the clear coat. Run your fingernail across the mark. If the nail glides over it without catching, the color coat underneath is intact. These respond well to polishing compounds alone. Small scratches penetrate into the color coat but stop before reaching the primer. These need filling and a light application of matched touch-up paint. Chips go deeper, exposing bare primer or even raw metal. You can see this when the center of the damage looks noticeably lighter or has a metallic sheen. Chips left untreated will rust, especially if you live near the coast or in regions with road salt.
Here is a quick reference for classifying the damage you are looking at:
| Flaw type | Layer affected | Correction method |
|---|---|---|
| Surface scratch | Clear coat only | Polishing compound |
| Small scratch | Color coat | Touch-up paint plus polish |
| Paint chip | Primer or metal exposed | Sand, paint, clear coat, blend |
| Swirl marks | Clear coat micro-abrasions | Machine or hand polish |
| Paint bubble | Moisture beneath coating | Sand down, reprime, repaint |
Inspect the damage in natural daylight from multiple angles before deciding on your approach. A simple flashlight held at an angle can reveal depth that flat lighting hides.
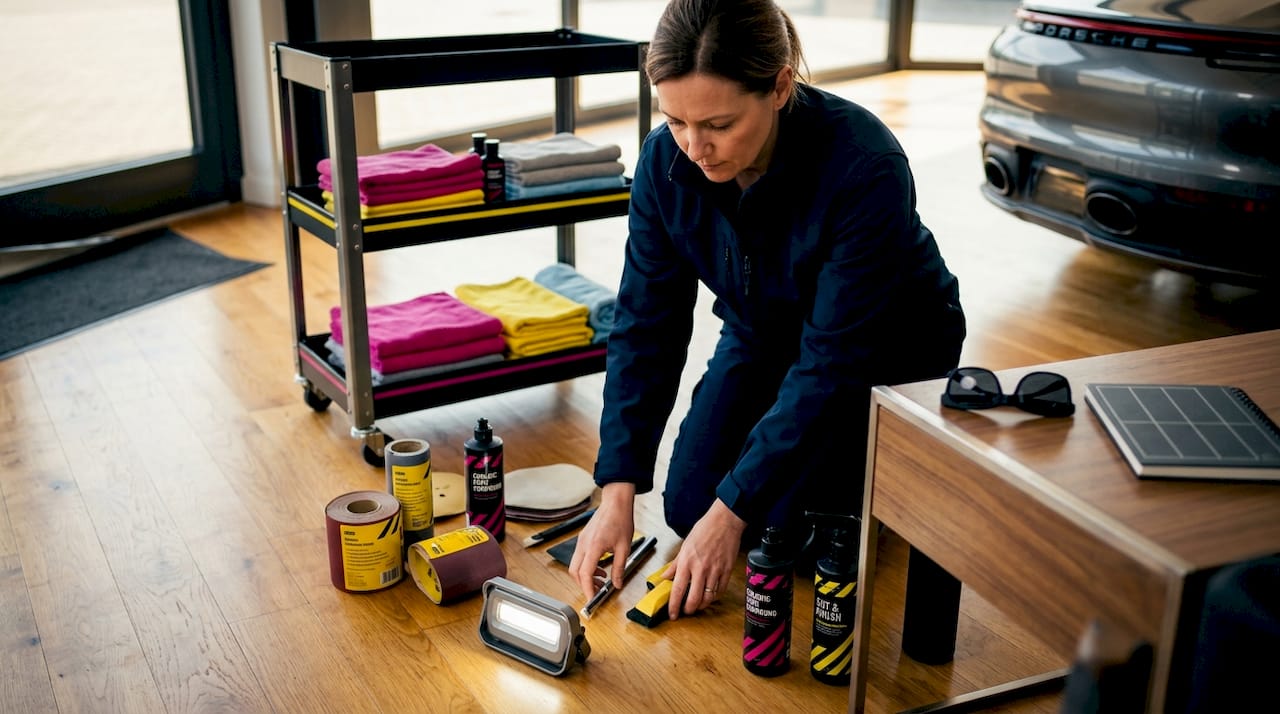
Tools and workspace setup
Getting the right materials together before you start saves time and prevents mid-repair mistakes. Here is what you will need for most minor repairs:
- Wet/dry sandpaper in 800, 1200, 1500, and 2000 grit
- Polishing compound (coarse and fine grades)
- Microfiber cloths and a foam applicator pad
- Color-matched touch-up paint (use your vehicle’s paint code, found on the door jamb sticker)
- Automotive clear coat spray or brush-on
- A detailing clay bar and lubricant spray
- Isopropyl alcohol (70 percent or higher) for degreasing
- Fine artist brushes for chip filling
- Masking tape for protecting surrounding panels
Effective paint correction requires a shaded, dust-free environment with temperatures above 60°F. Cold temperatures prevent paint from bonding properly to the surface, and direct sunlight causes products to dry too fast for blending to work. A garage or covered carport on a mild day is ideal.
Pro Tip: Before buying touch-up paint, search your vehicle’s paint code online and order from a supplier that mixes to match. Generic “close enough” colors look obviously off once the repair dries.
Organize your workspace so everything is within arm’s reach. Stopping mid-repair to find a rag or sandpaper grit leaves paint drying unevenly. Lay out your tools in the sequence you will use them.
Polishing out surface scratches step by step
Surface-level fixing paint imperfections through polishing is one of the most satisfying repairs you can do yourself. The process is straightforward when done in the correct order.
- Wash the vehicle thoroughly. Use a pH-neutral shampoo and rinse completely. Any dirt left on the panel becomes an abrasive and creates new scratches during polishing.
- Clay the surface. Work a clay bar over the panel with lubricant spray. Clay removes embedded contaminants like brake dust and industrial fallout that washing cannot. The surface should feel smooth like glass when done.
- Apply a coarse polishing compound first. Work a small amount into a foam pad and use overlapping passes with moderate pressure. Diminishing abrasive compounds break down from coarse to fine during the buffing process, correcting the scratch while minimizing the risk of creating new defects.
- Follow with a fine finishing polish. This removes any hazing left from the coarser compound and restores full depth of gloss.
- Wipe clean with a microfiber cloth. Inspect the area under good lighting. Rotate the cloth frequently to avoid reintroducing compounds to the surface.
- Apply a sealant or wax. Once polishing is complete, a paint sealant adds a protective layer that keeps the corrected area from oxidizing quickly. Apply with a clean foam pad and buff off after the product hazes.
Pro Tip: If polishing by hand, use a back-and-forth motion rather than circular. Circular hand polishing is more likely to create swirl marks that you then have to correct again.
For light swirl marks across a full panel, a dual-action (DA) polisher cuts the work time significantly and reduces the risk of burning through the clear coat that comes with rotary machines.
Repairing chips and deeper scratches
Deeper damage requires more steps, but the process is not complicated. What separates a professional-looking result from a visible repair patch is patience and thin application. Mobile paint repair techniques used by professionals follow the same fundamentals you can apply at home.
Follow these steps for chips and deeper scratches:
- Clean and degrease the area. Wipe the chip or scratch with isopropyl alcohol on a microfiber cloth. Any wax, oil, or residue will prevent paint from bonding.
- Sand the edges lightly. Use 800 or 1000 grit wet sandpaper to feather the edges of the damage. The goal is to smooth the transition between the undamaged surface and the exposed area, not to sand aggressively.
- Apply color-matched touch-up paint in thin layers. Use a fine brush to place the paint precisely within the damaged area. Multiple thin coats prevent raised edges and runs, which are the most visible signs of a DIY repair. Wait 20 to 30 minutes between coats.
- Let the color coat dry fully. Give it at least two hours before moving to clear coat.
- Apply clear coat in thin, even layers. Two or three light coats build enough depth. Extend the clear coat slightly beyond the repair edges to help it blend into the surrounding finish.
- Use blending solution to soften the edges. Apply blending solution sparingly, misting from about 20 to 30 cm away. Too much causes hazing and runs. The goal is to soften the clear coat edge so it transitions invisibly into the original finish.
- Allow 24 to 48 hours to cure before wet sanding or polishing. Rushing this step is where most repairs fail.
- Wet sand with 1500 and then 2000 grit to level the repair flush with the surrounding surface.
- Polish and protect using the same steps described in the polishing section above.
Key things to keep in mind during chip repair:
- Work in the shade. Direct sun causes touch-up paint to skin over before it flows flat.
- Never apply touch-up paint from the bottle with the built-in brush over large areas. Use a fine artist’s brush for control.
- Blending paint often requires extending the repair area across natural body lines to mask any subtle color or shade differences that read as a patch.
Pro Tip: After the color coats are done but before clear coat, check the filled area under direct sunlight. This is your last chance to apply another thin coat if coverage looks thin or uneven before the clear coat locks in the color.
Common mistakes and how to verify results
Even experienced enthusiasts make avoidable errors. The most frequent problems in DIY paint repair come down to rushing and over-application.
- Applying paint or clear coat too thickly creates runs and blobs that require sanding flat and starting the clear coat process again.
- Polishing before the repair is fully cured pulls color out of the repair and leaves a dull patch where the paint has not hardened.
- Over-polishing thins the clear coat to the point where the base color shows through, causing a dull spot that cannot be corrected without repainting.
- Not testing the color match before committing leads to obvious two-tone repairs. Test touch-up paint on a hidden panel section and let it dry completely before applying to the visible damage.
- Skipping the clay step before polishing leaves abrasive particles on the surface that create new scratches.
Inspect your repair in shade, direct sunlight, and from multiple angles to check for obvious repair lines or color mismatches. What looks seamless under one light source can show as a visible patch under another.
A repair that looks good in the garage but shows a halo ring in afternoon sunlight is not finished. Verification under multiple lighting conditions is not optional. It is the final step of the repair.
Pro Tip: Walk a full circle around the repaired area while holding a portable LED work light. Tilt the angle as you go. Any raised edge, color shift, or texture difference will appear immediately.
What I have learned from years of paint work
I have seen dozens of DIY repairs come through the studio that were well-intentioned but undermined by one or two skipped steps. The most common issue is not the technique itself. It is the environment.
People spend money on quality touch-up paint and the correct polishing compounds, then apply them in a windy driveway in the afternoon sun. The product did not fail. The conditions did. In my experience, protecting your workspace from dust and temperature extremes matters more than any specific brand of product you use.
The second thing I have learned is that blending takes longer than people expect. You can lay down perfect color coats and a clean clear coat, but if the edges are not properly softened and feathered, the repair will always read as a patch. Understanding how light interacts with curves and body lines gives you the instinct to extend your blending area before it is too late.
My honest take: most people overcomplicate the paint selection and undercomplicate the prep work. Spend more time cleaning, degreasing, and feathering edges. That preparation is what delivers seamless results, not the price tag on your polishing compound.
After a repair is complete, the smartest move you can make is protecting it. A quality ceramic coating or paint protection film keeps the corrected area from getting hit again within a few months. Repairing the same spot twice is avoidable.
— Emmanuel
Protect your paint after every repair

Correcting paint flaws is only half the job. Once the surface is restored, leaving it unprotected means the same environment that caused the original damage will attack it again. At Mannyceramicprotouch, the team works specifically with luxury and high-value vehicles to apply Liquid PPF solutions that form a sacrificial barrier over corrected paint surfaces. For clients who want gloss enhancement alongside protection, ceramic coating packages deliver long-term hydrophobic protection that makes maintenance dramatically easier. You can also explore paint protection film services designed to guard against rock chips and daily road hazards before they ever reach the paint. After the work you have put into a proper repair, professional protection keeps it looking clean and intact far longer than wax alone.
FAQ
What is the best way to fix a surface scratch at home?
Surface scratches that affect only the clear coat respond well to a quality polishing compound applied with a foam pad or microfiber cloth. No touch-up paint is needed if the color coat underneath is undamaged.
How long should touch-up paint cure before polishing?
Allow 24 to 48 hours for touch-up paint and clear coat to cure fully before wet sanding or polishing. Polishing too early pulls soft paint and ruins the repair.
How do I know if a scratch needs touch-up paint or just polish?
Run your fingernail across the scratch. If it catches or the scratch shows a different color underneath, you need touch-up paint. If the nail glides over it, polishing alone will restore the surface.
Can I blend touch-up paint into the surrounding finish myself?
Yes, but it requires blending solution applied as a light mist and proper feathering of the clear coat edges. Extending the repair across body lines helps hide subtle color differences between new and original paint.
Does ceramic coating protect repaired paint?
Ceramic coating bonds to the clear coat and provides a hydrophobic layer that resists UV damage, chemical etching, and light abrasion, making it an effective protective finish over any corrected area.