

What every car owner needs for a professional exterior detail
A thorough exterior detail requires the right tools and products working together in the correct sequence. Get that combination right, and you protect your paint, remove bonded contaminants, and achieve a finish that holds up over time. Get it wrong, and you risk swirl marks, stripped sealants, and paint that ages faster than it should. A full exterior detail when done properly covers cleaning, inspection, and protection from start to finish and can take several hours.
The exterior detailing essentials every car owner needs fall into four categories: washing tools, surface decontamination products, protective coatings, and specialized brushes and applicators. Here is a quick-reference breakdown before the detailed sections below.
Core exterior detailing supplies:
- Two wash buckets with grit guards — one for soapy water, one for rinsing; traps grit away from your wash mitt
- pH-balanced car wash soap — formulated to clean without stripping wax or sealants
- Microfiber wash mitt — chenille or microfiber construction traps dirt in fibers rather than dragging it across paint
- Microfiber drying towels — high-GSM construction absorbs water fast without scratching clear coat
- Clay bar or clay mitt — removes bonded contaminants that soap cannot lift, leaving paint smooth and ready for protection
- Detailing brushes — wheel brushes, boar’s hair brushes, and trim brushes for tight spaces and delicate surfaces
- Polishing compound and dual-action polisher — corrects light swirls, haze, and oxidation before protection is applied
- Wax, synthetic sealant, or ceramic spray — locks in gloss and shields paint from UV, water spots, and road grime
- Detailing spray — quick-refresh product for light dust and fingerprints between full washes
- Tire and trim applicator pads — delivers even, controlled coverage of dressings on rubber and plastic
- Ammonia-free glass cleaner — streak-free formula safe for tinted windows and coated glass
- Pressure washer and foam cannon — pre-soaks panels with thick foam to loosen dirt before contact washing
Washing tools and products that protect your paint from the start
The washing stage is where most paint damage happens, and it is almost always caused by the wrong tools or the wrong technique. Starting with the right supplies eliminates the majority of that risk.
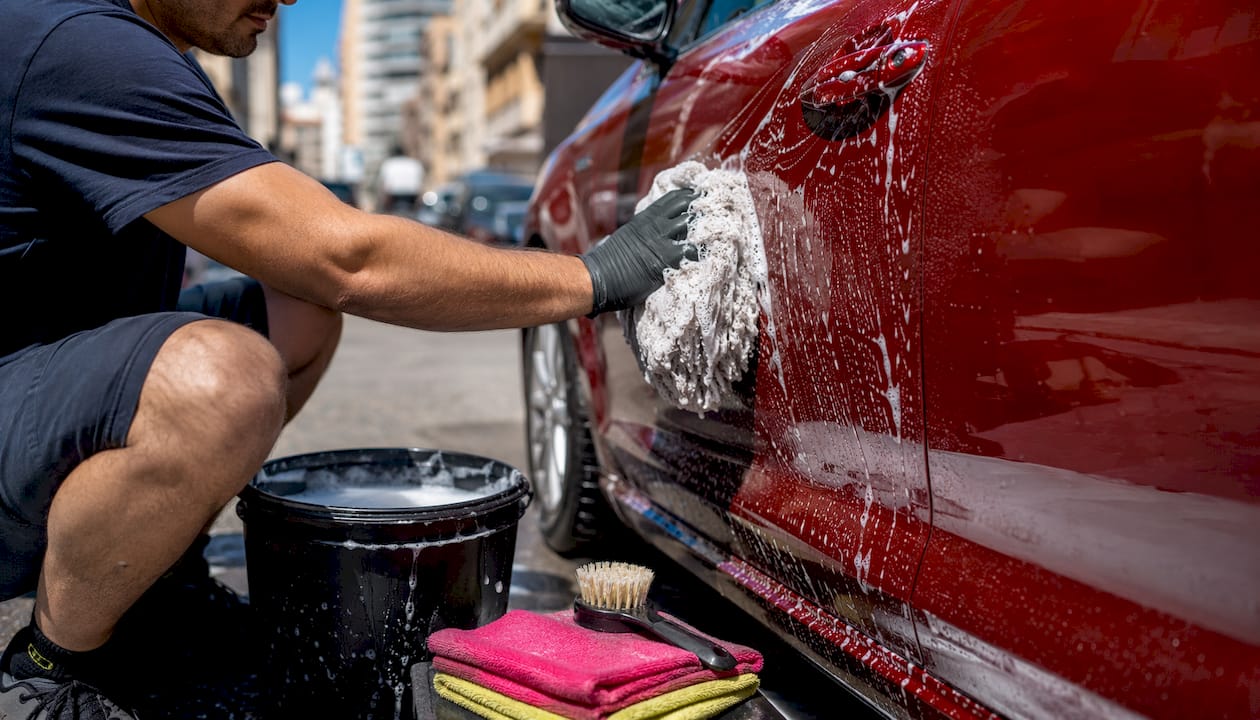
The two-bucket method with grit guards is the industry standard for scratch-free washing. One bucket holds your soapy wash solution; the second holds only clean rinse water. A grit guard sits at the bottom of each bucket, pulling dirt downward so it stays trapped rather than transferring back onto your mitt. Professionals treat this method as mandatory, not optional, because a single bucket turns rinse water into a contamination bath that you dip into repeatedly.
Washing essentials at a glance:
- Wash mitt (microfiber or chenille) — holds more suds than a sponge and traps grit deep within fibers rather than dragging it across paint
- pH-balanced car wash soap — dish soap strips wax and sealants, leaving paint unprotected; a dedicated car shampoo lifts road grime while keeping protective layers intact
- Foam cannon or foam gun — attaches to a pressure washer or garden hose to apply a thick pre-soak layer that loosens bonded dirt before your mitt makes contact
- Pressure washer — speeds up rinsing and pre-washing; keep the nozzle at a safe distance from panel gaps and trim seals
- Clay bar or clay mitt — after washing, bonded contaminants like tar and industrial fallout remain on the paint surface; clay removes them and leaves the finish smooth and ready for polish or protection
Pro Tip: Wash in a shaded area or when panels are cool to the touch. Direct sunlight causes soap and water to dry rapidly, leaving water spots and streaks that are difficult to remove without polishing.
Always wash from the top down, working panel by panel with straight overlapping strokes rather than circular scrubbing. Rinse the mitt in the clean bucket after every panel before reloading soap. That single habit, combined with a grit guard, keeps abrasive particles off your paint throughout the entire wash.
Protective coatings and finishing products that preserve your paint long-term
Washing reveals your paint. Protective coatings are what make that result last. Choosing the right product depends on how much durability you want and how often you plan to maintain the vehicle.
Wax, sealants, and ceramic sprays each serve a different purpose. Carnauba wax delivers a warm, classic glow and applies easily by hand, but it typically requires reapplication every few months. Synthetic sealants bond to the clear coat and last considerably longer, offering stronger resistance to UV rays, water spots, and road contamination. Ceramic sprays sit between the two: simpler to apply than a full ceramic coating, they provide solid water-beading behavior and a noticeable gloss boost with each application. Understanding surface preparation before applying any of these products is what separates a coating that lasts from one that fails within weeks.
Protective coating essentials:
- Carnauba wax — classic finish, warm depth, easy hand application; best for cars detailed frequently
- Synthetic paint sealant — bonds to clear coat for longer-lasting protection against UV and environmental fallout
- Ceramic spray — spray-and-wipe application with strong hydrophobic properties; a practical maintenance option between professional coatings
- Detailing spray — removes light dust, fingerprints, and water spots between washes while adding a quick gloss boost; works on paint, chrome, and glass
- Tire dressing — applied with a dedicated applicator pad for a clean, even finish on rubber sidewalls; avoid over-application to prevent sling onto paint
- Trim restorer — revives faded black plastic and rubber that has dulled from sun exposure; apply thinly and wipe off excess immediately
Apply wax or sealant only after the paint is fully clean and decontaminated. Sealing over contamination traps the problem under the finish rather than solving it. Work in a shaded area, apply in thin even layers, and allow proper cure time before exposing the vehicle to water or road debris.
Detailing brushes and applicators for cleaning tight spots without damage
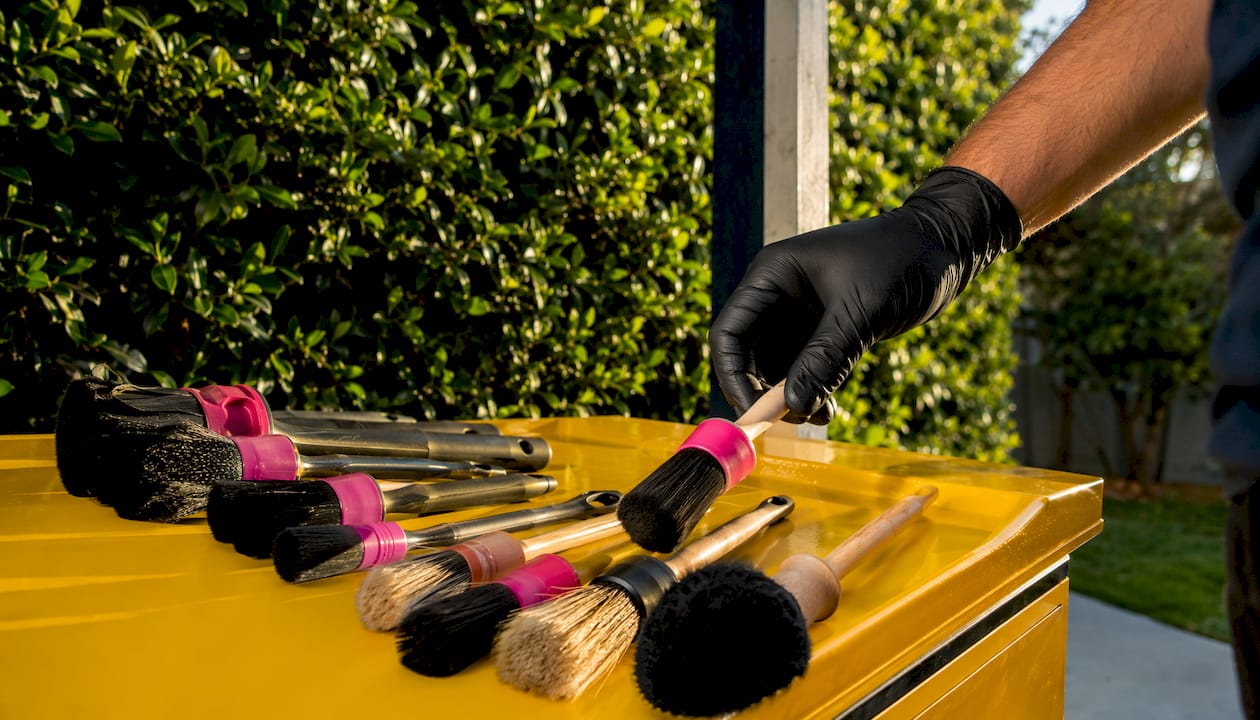
Brushes and applicators handle the areas a wash mitt cannot reach and the surfaces that require more care than a standard microfiber towel can provide. Using the wrong brush in the wrong place is one of the fastest ways to scratch a delicate surface or cross-contaminate your paint with brake dust.
Wheel brushes are built for the harshest cleaning task on the exterior. Brake dust is highly abrasive, and it accumulates in spoke gaps, barrel interiors, and lug nut recesses where a rinse alone will not reach. A firm-bristled wheel brush with a long, flexible shaft reaches deep into barrel areas without scratching the wheel face. A separate, stiffer tire brush handles sidewall scrubbing and preps rubber for dressing. Using dedicated brushes for wheels and keeping them completely separate from your paint tools prevents brake dust from transferring to cleaned panels.
Brushes and applicators you need:
- Wheel brush (firm bristles) — cleans wheel faces, spokes, and lug nut areas; chemical-resistant construction handles wheel cleaners without degrading
- Barrel brush (long flexible shaft) — reaches deep into wheel barrels where standard brushes cannot access
- Tire brush (stiff bristles) — removes browning and embedded grime from sidewalls; preps rubber for even dressing application
- Boar’s hair detailing brush — natural soft bristles lift dust and debris from emblems, grilles, vents, and trim without scratching; safe on painted surfaces and delicate finishes
- Exterior trim brush — tackles grilles, badges, and tight panel seams where a mitt leaves residue behind
- Microfiber applicator pad — spreads wax and sealant evenly across flat and curved surfaces without streaking
- Foam applicator pad — holds the right amount of tire gel or dressing for controlled, no-sling application on rubber and trim
Cross-contamination is the detail-killing mistake most car owners overlook. Keep one set of brushes strictly for wheels and wheel wells, and a separate set for painted surfaces, trim, and glass. Color-coding your buckets and brushes by task makes this easy to maintain consistently.
Expert tips and common mistakes that separate good details from great ones
Most detailing mistakes are not about the products. They are about sequence, surface temperature, and using tools in the wrong order. Fixing those habits produces better results than buying more expensive supplies.
Start with wheels, always. Cleaning wheels before painted panels is a professional standard, not a preference. Brake dust and wheel cleaner residue will splash onto panels during wheel cleaning. If you wash the paint first, that splashback recontaminates surfaces you just cleaned. Work wheels and wheel wells completely, rinse them thoroughly, and let the runoff clear before touching any painted surface. Detailing experts consistently point to this sequence as one of the highest-impact habits in a proper exterior routine.
Surface prep with chemical decontamination matters more than most car owners realize. An iron remover spray dissolves ferrous particles embedded in the clear coat that clay alone cannot address. Applied after washing and before claying, it reacts visibly with brake dust and industrial fallout, turning purple as it works. This step is what gives paint that genuinely smooth, glass-like feel before polish or protection goes on. Skipping it means sealing contamination under your wax or sealant. For a deeper look at what this process involves, Mannyceramicprotouch covers paint decontamination in detail.
Drying technique determines whether a careful wash ends with a clean finish or new swirl marks. Lay a clean, high-GSM microfiber drying towel flat on the panel and glide it in straight lines with minimal pressure. Never drag a towel with downward force or use circular motions. A drying aid sprayed onto the panel before the towel makes contact lubricates the surface, reduces towel drag, and picks up any remaining water spots more effectively than a dry pass alone.
Pro Tip: When using a dual-action polisher for paint correction, apply a small amount of polishing compound to the pad and work at a low speed setting first to spread the product before increasing speed. This prevents compound from flinging off the pad and ensures even coverage across the panel.
Common mistakes to avoid:
- Washing with dish soap, which strips wax, sealants, and rubber trim conditioners
- Washing in direct sunlight, which causes soap and water to dry before rinsing and leaves permanent water spots
- Using one bucket, which recycles contaminated rinse water back onto your paint with every mitt dip
- Skipping the pre-rinse, which grinds loose debris into paint during the foam or contact wash stage
- Reusing a dirty mitt across multiple panels without rinsing it in the clean bucket
- Applying wax or sealant over unclayed paint, which seals in bonded contamination rather than protecting clean paint
- Using the same brushes on wheels and painted surfaces, transferring brake dust to clear coat
Proper glass care is often treated as an afterthought, but it affects both visibility and the overall finished appearance of the vehicle. An ammonia-free glass cleaner paired with a waffle-weave or lint-free microfiber towel removes haze, fingerprints, and road film without streaking or damaging window tint. For guidance on maintaining automotive glass correctly, caring for your car’s glass covers the key practices worth following.
When DIY detailing reaches its limits
A well-assembled kit of exterior detailing essentials handles washing, decontamination, and basic protection effectively. For car owners who want longer-lasting results without repeated reapplication, professional-grade protection goes further than any consumer wax or sealant can.

Mannyceramicprotouch specializes in Liquid Paint Protection Film and high-performance ceramic coatings for luxury, exotic, and high-value vehicles. These are not detail-shop add-ons. They are engineered surface preservation systems that protect against rock chips, UV degradation, chemical etching, and daily environmental wear for years rather than weeks. If you are serious about maintaining your vehicle’s finish at a showroom level, understanding the difference between Liquid PPF and traditional PPF is the right place to start. For owners who want to understand what ceramic paint protection actually delivers at a professional level, Mannyceramicprotouch provides a detailed breakdown of what the technology does and what to expect from a properly applied coating.
Key Takeaways
Effective exterior detailing depends on using the right tools in the right sequence, with surface decontamination and proper drying technique protecting the paint as much as any coating does.
| Point | Details |
|---|---|
| Two-bucket method with grit guards | The industry standard for scratch-free washing; traps grit away from the wash mitt on every rinse. |
| pH-balanced soap only | Dish soap strips wax and sealants; a dedicated car shampoo cleans without damaging protective layers. |
| Clay before coating | Clay bars and clay mitts remove bonded contaminants that soap cannot lift, leaving paint ready for protection. |
| Wheels first, always | Cleaning wheels before painted panels prevents brake dust and rinse splashback from recontaminating clean paint. |
| Drying technique matters | Glide a high-GSM microfiber towel in straight lines with minimal pressure; use a drying aid to reduce drag and prevent swirl marks. |
Recommended
- Advanced Detailing Procedures: Expert Guide for 2026 – Many Ceramic Pro Touch
- 12 Signs Your Car Needs Detailing: 2026 Guide – Manny’s Ceramic Pro Touch and Luxury Surface Preservation™
- Exterior Detailing for Impressive Cars in Fort Lauderdale
- Tips for Selecting Detailing Services That Protect Your Car – Many Ceramic Pro Touch