TL;DR:
- Proper preservation techniques are essential for maintaining a luxury vehicle’s value by preventing contamination and surface defects. Following a precise, step-by-step workflow—from thorough washing and decontamination to paint correction and layered protection—ensures long-lasting, flawless results. Skilled application, controlled environments, and accurate scheduling are key factors that distinguish professional results from amateur efforts.
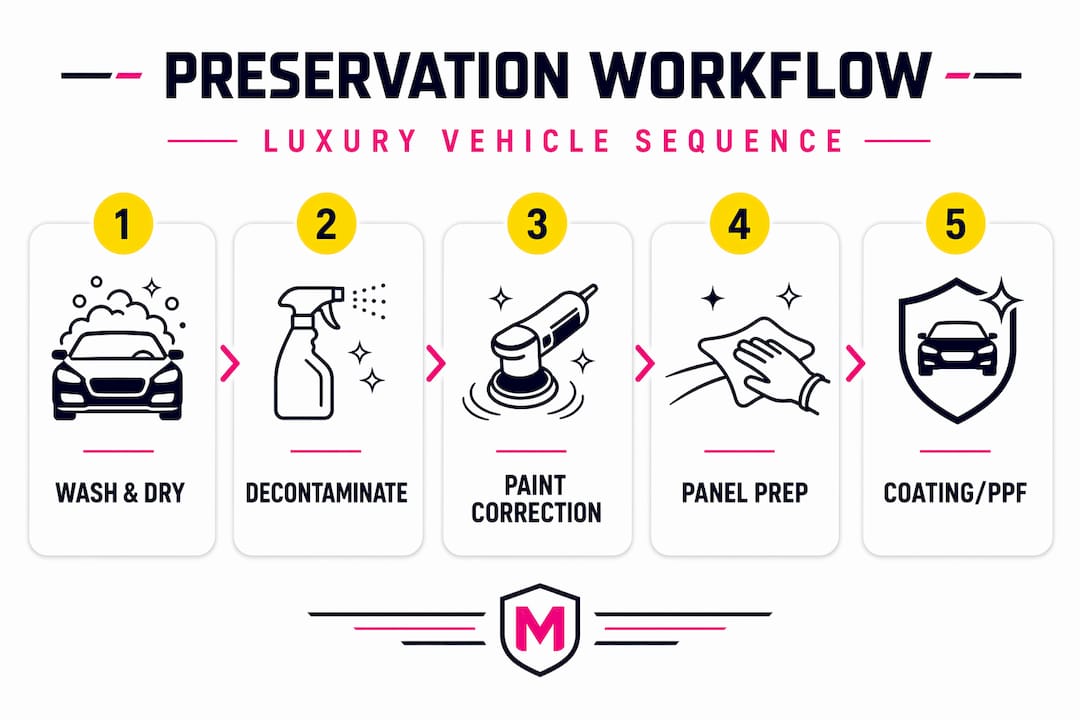
Improper preservation techniques can strip thousands of dollars from a luxury vehicle’s resale value before a single mile is driven in adverse conditions. A professional preservation workflow follows a precise sequence: exterior wash, paint decontamination, paint inspection, correction when needed, and layered protection application. Following this structured luxury auto preservation approach, as outlined in the Chemical Guys detailing flow chart, reduces rework, prevents cross-contamination, and produces results that hold up over years, not just months. This guide walks you through every step in detail.
Table of Contents
- Understanding the luxury car preservation workflow
- Essential tools and materials for preservation
- Executing advanced paint correction and protection
- Combining PPF and ceramic coating: Multi-layer protection
- A professional’s take: The hidden keys to flawless preservation
- Next steps: Unlock superior protection for your luxury car
- Frequently asked questions
Key Takeaways
| Point | Details |
|---|---|
| Sequence matters | Following the correct workflow order prevents cross-contamination and ensures maximum protection. |
| Quality tools boost results | Using professional-grade materials and equipment enhances durability and finish. |
| Technique trumps product | Expert application skills are more predictive of success than brand name products. |
| Layer protection wisely | Combining PPF and ceramic coatings yields stronger, longer-lasting defense. |
| Cure times are crucial | Proper curing and scheduled processes prevent defects and optimize surface bonding. |
Understanding the luxury car preservation workflow
Every professional preservation workflow follows a non-negotiable order of operations. The sequence exists for functional reasons, not convention. Washing must come before decontamination, decontamination must come before inspection, and protection must never be applied until the surface is fully corrected and clean. Skipping or reversing steps introduces contaminants into the final protection layers, which causes bonding failures, uneven curing, and surface defects that require complete rework.
The logic behind the sequence is simple: each step creates the foundation for the next. Washing removes loose debris that would scratch during decontamination. Chemical and mechanical decontamination removes bonded contaminants like iron fallout, tar, and industrial deposits that washing cannot eliminate. Inspection under controlled lighting then reveals scratches, swirl marks, oxidation, and paint imperfections that, if left unaddressed, will be locked underneath your protective coating. Paint correction follows only if defects are found, and protection layers are applied last onto a surface that is now chemically clean and optically refined.
Why the sequence prevents cross-contamination
Applying a ceramic coating over a contaminated panel is one of the most common and costly mistakes in luxury car care. Contaminants trapped beneath a cured ceramic layer are permanent. You cannot polish them out without removing the coating first, which means starting the entire process over. The same applies to preventing paint damage during wash cycles: using a dirty mitt or skipping the pre-rinse introduces swirl marks before the process even reaches the correction phase.
Here is a clear comparison of a proper workflow versus a rushed one:
| Workflow stage | Professional approach | Rushed approach |
|---|---|---|
| Wash | Two-bucket method, pre-rinse, pH-neutral soap | Single bucket, dish soap |
| Decontamination | Iron remover + clay bar on full exterior | Skipped or partial |
| Inspection | Controlled lighting, panel-by-panel review | Visual glance in sunlight |
| Correction | Machine polish on defect areas | Skipped |
| Protection application | Clean panel wipe, controlled environment | Applied over residue |
| Final result | Flawless, long-lasting bond | Bonding failure, visible defects |
Key workflow principles for luxury vehicles:
- Never apply any chemical or protection layer to a wet or uncured surface
- Work panel by panel to maintain control over flash times and coverage
- Use dedicated applicators for each product to prevent cross-contamination
- Allow full decontamination dwell times before mechanical agitation
- Document each step with notes on products used, temperatures, and cure times
Pro Tip: Keep a simple workflow log for every vehicle you preserve. Recording the products applied, their batch numbers, application temperatures, and cure times gives you a reliable reference if any issue develops weeks later. This habit separates professional results from amateur ones.
Bringing in paint correction services when defects exceed what light polishing can resolve is always the right call before any protective layer goes down. Coating over imperfections amplifies them under certain lighting conditions, particularly on darker paint colors.
Essential tools and materials for preservation
Before beginning any preservation workflow, assembling the correct tools and materials is as important as the technique itself. Using substandard or contaminated equipment introduces risk at every stage. A microfiber wash mitt that has not been properly laundered, for instance, carries embedded grit that causes micro-scratches across the entire vehicle during the wash phase.
The Chemical Guys detailing workflow emphasizes creating a clean foundation first, completing drying, and only then applying protection so the protective layer locks in results. This principle reinforces why your material selection must align with each phase of the process.
Essential preservation materials by stage
| Stage | Required materials | Quality standard |
|---|---|---|
| Wash | pH-neutral car wash soap, two buckets, grit guards, microfiber mitts | Professional-grade, lint-free |
| Decontamination | Iron fallout remover, tar remover, clay bar or clay mitt, lubricant | pH-balanced, non-acid formulas |
| Paint correction | Dual-action or rotary polisher, polish compounds, foam/microfiber cutting pads | Machine-rated for paint thickness |
| Panel prep | Isopropyl alcohol (IPA) wipes, panel prep spray | 70-99% IPA concentration |
| Ceramic coating | Applicator pads, leveling microfibers, coating bottles | Low-lint, controlled pile height |
| PPF application | Slip solution, squeegee, heat gun, edge sealant | Professional installation-grade |
Choosing professional-grade microfiber towels matters more than many owners realize. Standard big-box store towels carry inconsistent pile density, which means uneven pressure during application and an elevated risk of light scratching on soft luxury paint. Dedicated low-lint leveling towels for ceramic coating work allow you to remove the coating’s flash layer cleanly without dragging material across the panel.
For liquid PPF options and ceramic coating packages, the material selection also extends to the protection product itself. Not all ceramic coatings are formulated for high-gloss luxury finishes, and not all paint protection films carry the same clarity rating. Matching the product to the vehicle’s specific paint system and finish type is part of what differentiates professional results from retail-grade outcomes.
Many quality-focused studios, including premium detailing services that operate at this level, stock separate chemical inventories for different paint types, including matte, satin, and high-gloss finishes.
Pro Tip: Always use a dedicated panel prep wipe on every section immediately before applying ceramic coating or liquid PPF. Skin oils, polish residue, and even fingerprints can compromise adhesion. A single contaminated panel in an otherwise perfect application will show bonding irregularities once the coating cures.
Executing advanced paint correction and protection
With your tools ready, the advanced paint correction and protection application phase is where professional results are made or lost. This is the most technically demanding stage of the workflow, and it rewards patience and precision over speed.
Step-by-step paint correction and protection sequence
- Complete a final rinse and dry of the fully decontaminated vehicle before beginning any correction work
- Set up controlled lighting at low angles to reveal all surface defects including fine swirls, buffer trails, and oxidation
- Begin machine polishing on a test panel using your chosen compound and pad combination, checking for effective defect removal and paint safety before proceeding
- Work panel by panel in overlapping passes, keeping the polisher flat to the surface and maintaining consistent speed and pressure
- Wipe each corrected panel with a clean microfiber to remove polish residue, then inspect again under lighting before moving forward
- Apply a panel prep wipe using IPA solution to fully remove any remaining oils or polish carriers from the surface
- Apply ceramic coating application in small cross-hatch sections of 18 to 24 inches, leveling the flash layer before it hazes over
- Allow each coated panel to off-gas for the manufacturer’s recommended time before closing the vehicle in a controlled environment for initial cure
“Professional-grade application technique covering section control, flash and leveling, squeegee pressure and angles, and edge sealing is often more predictive of long-term results than the brand-name product alone.”
This insight is critical. Many clients arrive at professional studios after failed DIY ceramic coating attempts, where premium products delivered disappointing outcomes because the application process was inconsistent. The coating flash time window, which is typically 60 to 180 seconds depending on ambient temperature and humidity, must be respected. Coating applied to a hot panel or leveled too late creates high spots that are extremely difficult to remove without reapplication.
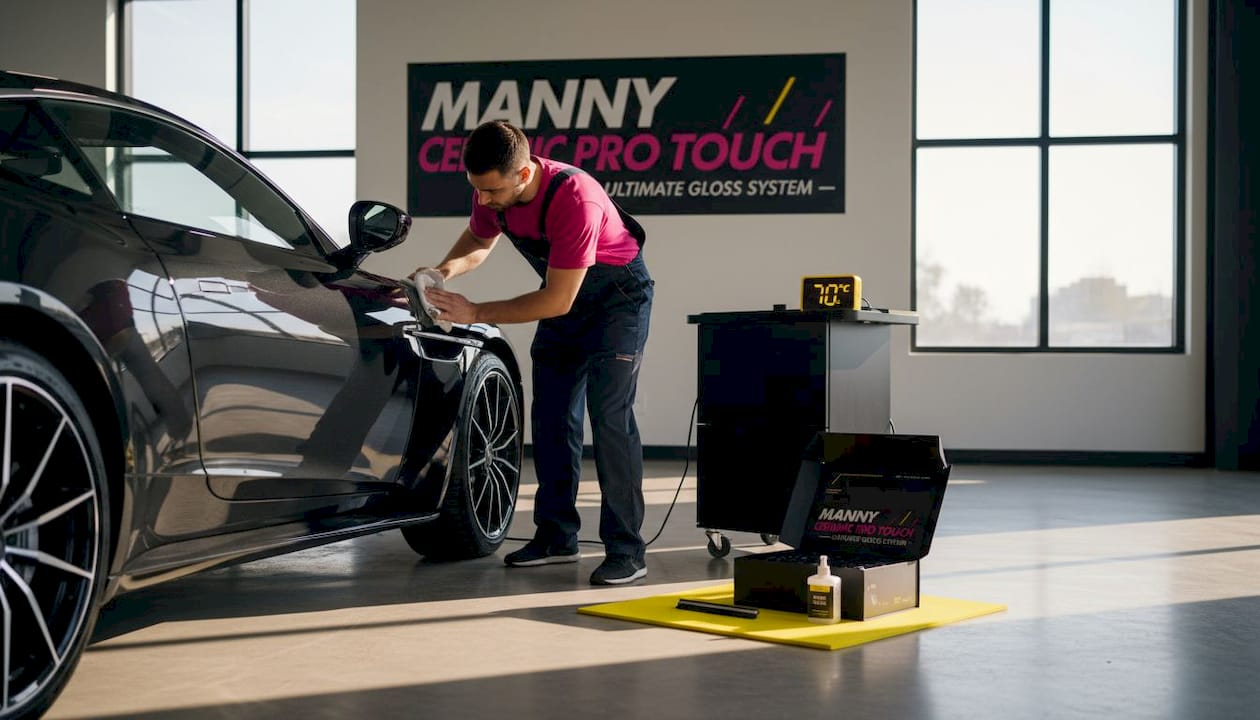
Surface temperature is one of the most overlooked variables in the entire workflow. Never apply ceramic coating or liquid PPF to a panel that is above approximately 77 degrees Fahrenheit. Heat accelerates flash times unpredictably, which causes uneven bonding and visible irregularities in the cured film. If the vehicle has been sitting in the sun, allow full temperature normalization before beginning protection application.
For mobile ceramic coating work, maintaining mobile ceramic coating quality standards requires portable shading, temperature monitoring, and strict humidity awareness. These environmental controls are what separate field applications that perform identically to studio work from those that fall short.
Pro Tip: Section control during ceramic coating application is the single most effective technique for eliminating high spots. Work in sections no larger than two feet square, leveling each one before moving to the next. Do not coat an entire panel in one pass and level all at once.
Combining PPF and ceramic coating: Multi-layer protection
For maximum preservation, the most sophisticated protection strategy involves combining paint protection film with a ceramic coating applied over the top. This multi-layer approach uses PPF as the physical impact barrier and ceramic coating as the chemical and UV resistance layer, with the added benefit of hydrophobic properties that keep the surface cleaner between maintenance washes.
Single-layer vs multi-layer protection comparison
| Protection type | Physical impact resistance | UV resistance | Hydrophobic properties | Longevity | Best for |
|---|---|---|---|---|---|
| Ceramic coating only | Low | High | Excellent | 3 to 7 years | Daily drivers, moderate environments |
| PPF only | High | Moderate | Good | 7 to 10 years | High-impact exposure areas |
| PPF + ceramic coating | High | Excellent | Excellent | 10+ years | Full preservation, maximum value retention |
Understanding how to properly schedule the combination is equally important. PPF must be applied first and allowed to cure before the ceramic coating is layered over it. Applying ceramic coating to a PPF film that has not fully cured can interfere with the film’s self-healing properties and may affect adhesion on both layers.
Common mistakes to avoid when combining PPF and ceramic coating:
- Applying ceramic coating before PPF has reached its minimum cure time
- Using a ceramic coating formulation not rated for application over PPF film
- Skipping the IPA panel prep step between PPF installation and ceramic application
- Applying the ceramic coating layer too thickly, which causes high spots on flexible film surfaces
- Failing to seal all edges of the PPF before ceramic coating application, which allows lifting over time
For owners weighing their options, reviewing the PPF vs ceramic coating comparison in detail is a useful starting point. Understanding the individual performance characteristics of each product makes the layered strategy far easier to justify at the investment level it requires. When both products are applied correctly and in the right sequence, advanced protection workflows at this level deliver results that hold up through years of exposure without requiring major reapplication.
A professional’s take: The hidden keys to flawless preservation
After working through hundreds of luxury and exotic vehicle preservation projects, one pattern becomes clear: owners consistently overestimate the importance of product selection and underestimate the role of technique. Clients frequently arrive with a preference for a specific ceramic coating brand based on online reviews, and while product quality does matter, that preference rarely determines the outcome as much as the method of application does.
The application technique variables including section control, flash and leveling timing, squeegee pressure during PPF installation, and edge sealing consistency are what determine whether a protection layer performs at its rated specification or falls short within the first year. We have seen industry-leading ceramic coating products fail prematurely because they were applied in humidity above 70% or leveled after the flash window had already closed. We have also seen mid-tier products last well beyond expectations because every application variable was controlled precisely.
The same principle applies to pro appearance enhancements. The vehicle’s paint must be in optimal condition before any protective layer goes down. This is not an optional step for high-value vehicles. A luxury car with swirl marks sealed under a seven-year ceramic coating will display those defects under showroom lighting for the entire life of that coating.
Scheduling also matters more than most guides acknowledge. Rushing the workflow to complete a vehicle in a single day often means applying protection layers before surfaces have fully cooled, before correction residue has been fully removed, or before decontamination chemicals have been properly rinsed. Each of these shortcuts creates a compounding risk. The professional standard is to respect every dwell time, every cure window, and every temperature requirement.
When choosing protection methods, the vehicle’s specific use case, storage conditions, and exposure profile should drive the decision, not general recommendations. A Rolls-Royce stored in a climate-controlled garage requires a different strategy than a McLaren driven daily on Florida roads. Matching the workflow to the actual risk environment the vehicle lives in is the hallmark of genuinely professional preservation.
Pro Tip: Always preserve vehicles in a clean, climate-controlled environment with ambient temperature between 60 and 77 degrees Fahrenheit and humidity below 60%. These conditions are not luxury preferences. They are functional requirements for achieving a flawless, lasting bond on any protective coating.
Next steps: Unlock superior protection for your luxury car
If you want the precision and permanence described in this guide applied to your own vehicle, working with a team that builds these workflows around your car’s specific needs is the difference between lasting protection and repeated maintenance.

Manny’s Ceramic Pro Touch LLC delivers tailored preservation strategies for luxury, exotic, and high-value vehicles using Liquid PPF and high-performance ceramic coatings. From selecting the right paint protection film specialist for your exposure profile, to evaluating the liquid vs traditional PPF tradeoffs for your specific finish, to understanding the full scope of ceramic coating benefits, the studio’s quality-first process is built for owners who expect showroom-level results that hold up over years, not just weeks.
Frequently asked questions
How often should I perform a full luxury car preservation workflow?
A comprehensive workflow should be performed every 6 to 12 months, depending on vehicle usage, climate, and how aggressively the paint surface is exposed to environmental contaminants.
Is it necessary to use both PPF and ceramic coating for superior car protection?
Combining both products delivers the highest overall protection level by pairing physical impact resistance with chemical and UV defense. PPF and ceramic coating together produce durability that neither product achieves independently.
What’s the biggest mistake luxury car owners make during paint protection?
Skipping or rushing surface preparation is the most common failure point. Thorough surface prep, including decontamination and paint correction before any coating application, is what allows the protection layer to bond correctly and cure without defects.
How long does ceramic coating take to cure fully?
Ceramic coatings typically require 7 to 21 days for full curing, depending on ambient temperature, humidity levels, and the specific product chemistry used in the formulation.